Tutorial for AT10II Latest Firmware Upgrade
Note:
It only supports AT10II upgrades with a capacity greater than 970K, as shown in the format pop-up window.
1. Overview
AT10II has received the latest upgrade! This upgrade upgrades the AT10II system to freeRTOS+emWin, bringing a brand new user experience.
The biggest changes in the new system are three points: first, the interface is more beautiful, second, the operation is smoother, and third, the functions are more complete.
2. File Description
There are two files in total, with the following functions
(1) AT10_BootLoadUpdate_V12.mac, used for AT10II remote control BootLoader (boot program) update, this file can only be used on the old system of AT10II remote control.
(2) AT10_RadioLink_V612S.bin (AT10II remote control firmware).
3. Copy the AT10_Download_V12.mac file to the remote control
(1) Prepare the AT10II remote control to be upgraded. First, connect the AT10II to the computer via USB, then power on the remote control and turn it on, as shown in Figure (1)

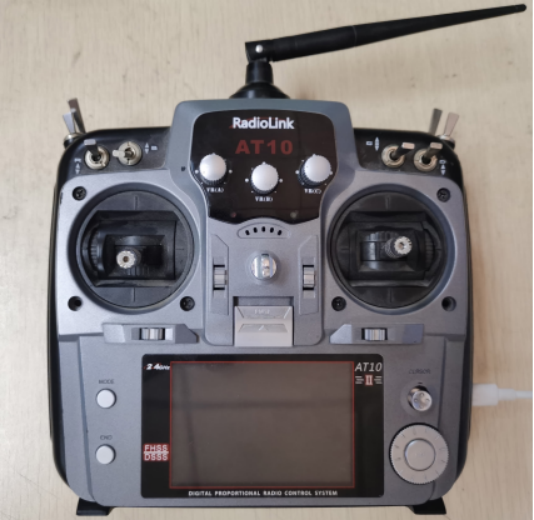
Figure (1)
(2) After the AT10II remote control is powered on, a formatting pop-up window will pop up, as shown in Figure (2)


Figure (2)
(3) Formatting requirements: Capacity: must be greater than 975K, file system: FAT, size: 512 bytes, and format, as shown in Figure (3). If it shows "Capacity: 460KB", it means the old AT10 is old version and it cannot be upgraded. Please check the step 6: Reasons for the failure of upgrading the old AT10.

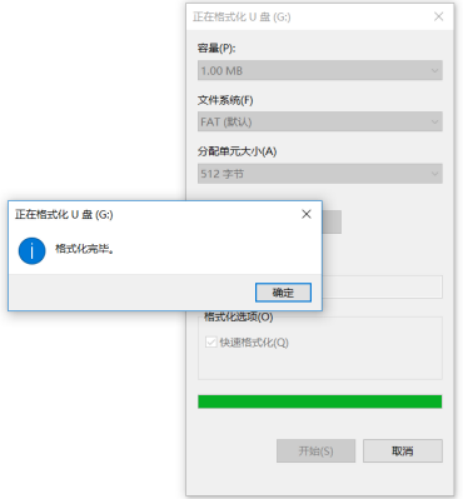
Figure (3)
(4) After formatting, copy the AT10_BootLoadUpdate_V12.mac file to the USB flash drive. After copying, unplug the USB and reopen the AT10II remote control. You can see the upgrade screen, as shown in Figure (4)
“NO (End)”: Press the “End” button on the AT10II remote control to exit the Bootloader upgrade.
“YES (PUSH)”: Press the “PUSH” button on the AT10II remote control to immediately upgrade the Bootloader.

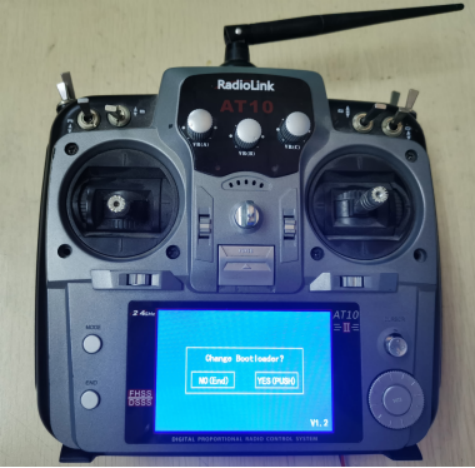
Figure (4)
(5) Press the "PUSH" button on the AT10II remote control to upgrade the Bootloader. The upgrade is completed as shown in Figure (5)

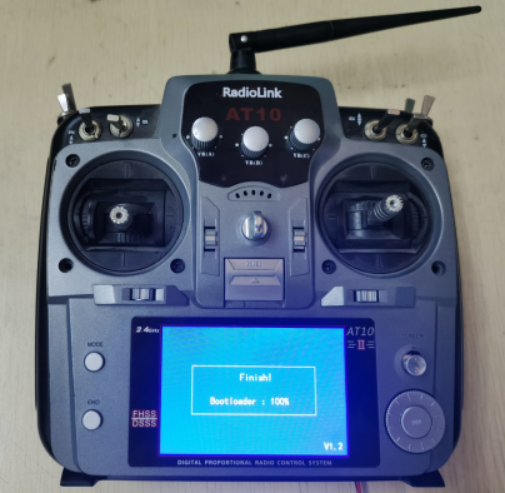
Figure (5)
4. Copy the AT10_RadioLink_V612S.bin file (or higher version firmware) to the AT10 remote control
(1) When the AT10II remote control is turned off, connect the AT10II to the computer via an USB cable, then turn on the AT10II remote control. After powering on, a formatting pop-up window will pop up, as shown in Figure (6)
Figure (6)
(2) Formatting requirements: file system: FAT, size: 512 bytes, and format, as shown in Figure (7)

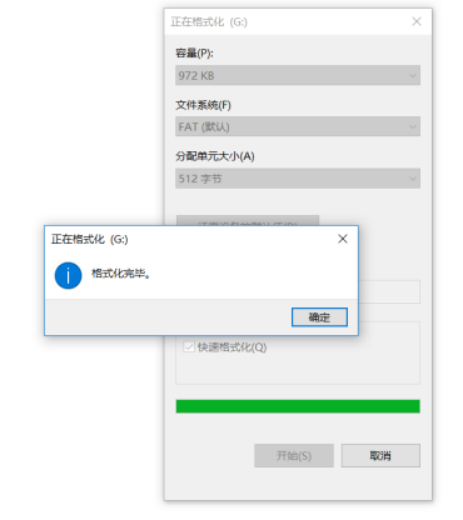
Figure (7)
(3) Copy AT10_RadioLink_V612S.bin to the U disk, unplug the USB after copying, power on again and restart. Because it is the first time to upgrade the firmware, the remote control parameters will be initialized and you need to wait for 2 minutes, as shown in Figure (8)

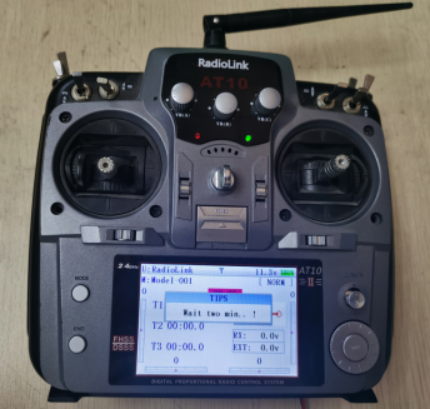
Figure (8)
(4) After the AT10II remote control new firmware is initialized, enter the interface and the system upgrade is completed, as shown in Figure (9)


Figure (9)
5. After the AT10II remote controller has been upgraded to the new firmware, the joystick and four knobs need to be calibrated. The calibration steps are as follows:
(1) Turn off the AT10II remote controller first, press and hold the left side of the tuning button of CH4 as shown in Figure (10), then turn on the remote controller. At this time, the red and green lights will flash.
(2) Move the joystick up, down, left, and right several times, and finally put the throttle joystick at the midpoint to complete the joystick calibration.
(3) Move the five potentiometer up, down, left, and right several times to complete the potentiometer calibration.
(4) Press and hold the right side of the tuning button of the CH4 as shown in Figure (10) to complete all calibrations.

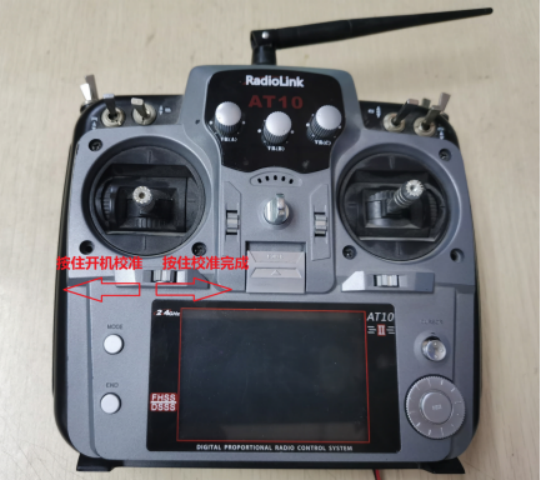
Figure (10)
6. Reasons for the failure of the old AT10 upgrade:
(1) The old version of AT10 does not support the latest system upgrade because the old AT10 only has 512K FLASH and the latest system firmware is about 915K. The method to distinguish the old AT10 is: connect the AT10 remote control when it is turned off to the computer via USB cable, then turn on the AT10 remote control. After powering on, a formatting pop-up window will pop up, as shown in Figure (11)
Figure (11)
(2) Click "Format Disk", and the formatting interface will pop up, as shown in Figure (12). If it shows "Capacity: 460KB", it means it is an old AT10, which does not support the new system at this time. After copying AT10_BootLoadUpdate_V12.mac, it cannot be turned on. You can only re-copy the AT10 old system firmware V1.4.6 or lower version firmware.

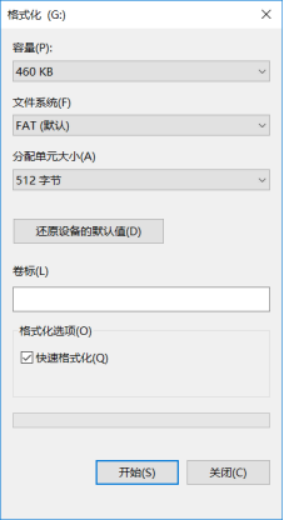
Figure (12)
Note 1: If you want to upgrade to the previous firmware after upgrading to the latest firmware, AT10 currently only supports upgrading back to V1.4.8AT firmware.
Note 2: The latest firmware of the new system and V1.4.8AT firmware can replace each other, but after each upgrade, all the set data will be reset.